When coming up with designs for different networks, I’ve found that more often than not the people from ‘the business’ or the people writing the applications put little or no thought into how their software may operate over a network. The requirements either never get fully developed during the design phase of the project, sometimes because the application owners aren’t really sure what bandwidth or latency requirements their product needs, or it just gets left out completely. If it works in production, it will definitely work in test right? Sometimes it comes as an afterthought, usually when the project is already complete and in the form of ‘the network is slow and my application is perfect’. In an effort to try and get ahead of these typical scenarios there are a few options that allow you to give the application and business owners a better idea of how they can expect their product to perform *before* it is put into production and relied upon. You can use these tools to test out anything from data file transfers to database queries to voice/video applications.
Apples to Apples
The first thing we want to do is to make sure we have as much of an apples to apples comparison as possible. A good example of what usually happens is the application(maybe a database query for example) gets developed in a 1Gbps lab LAN environment, but when deployed gets put over your DS3 or 100Mbps WAN link between a corporate site and datacenter. You’ve instantly changed the bandwidth(1Gbps to 10oMbps) and the latency (maybe something around 1ms in the LAN and 30ms over the WAN). These are going to produce drastically different results, and while it shouldn’t really come as a surprise(you did change multiple variables here, right?), it often does. It’s always better to avoid these headaches in advance if possible. Regardless of the WAN emulation tool you end up using, the end goal should be your testing environment as close as possible to how it will be used in the real world, things like bandwidth, latency, and packet loss will all play a role.
The Tools
Depending on what OS you are running and what type of environment you have available to you, you have some options. I’ll run through some of the common ones I’ve used, and the more popular ones out there, but this is by no means an extensive list. The ones that I am going to run through are all free, but there are a number of paid versions out there as well.
For the PC
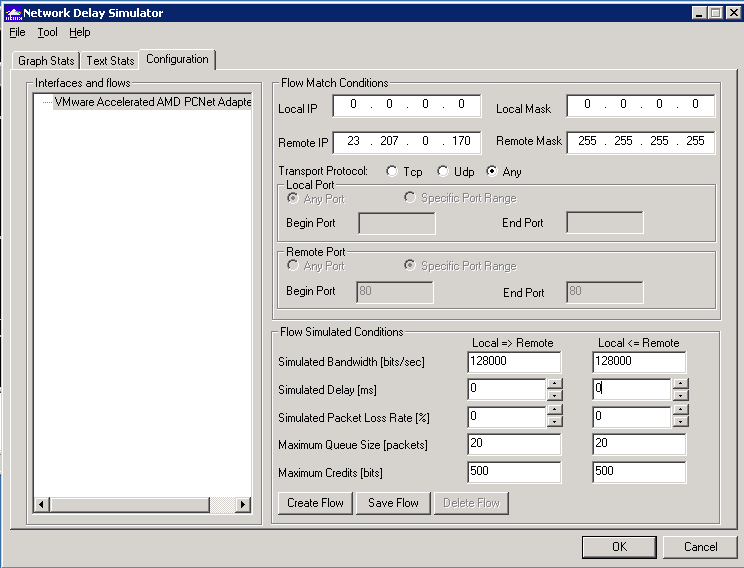
Akmalabs makes a program called Network Simulator that runs on Windows. Once installed you define flows of traffic you want to apply the WAN emulation to, and then specify parameters like bandwidth,latency,packet loss,etc. Any traffic that doesn’t match one of your defined flows will be unaffected by the WAN emulation. In the screenshot below I defined a flow where the source was any IP, and my destination was a computer in the same subnet as the test machine. For the sake of the example, let’s assume you were opening up a new location somewhere in Asia that would have a 2Mbps circuit, and you knew that the latency was about 250ms round trip. Before launching the site you wanted to test some application on your local network to see how it would perform once it is in Asia. I set the remote IP and host mask, set a speed of 2Mbps, and 125ms delay in each direction, then clicked Save.

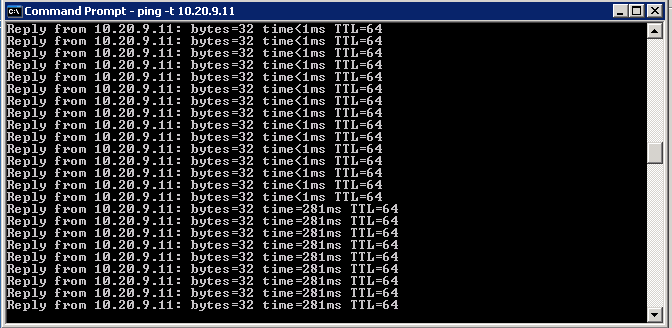
This next screenshot shows me pinging from the test machine(Running Network Simulator) to the test IP 10.20.9.11. You can notice that in the beginning of the ping the response times are <1 ms since it is on a 1Gb network. Once I clicked the ‘Save Flow’ button on the Network Simulator the RTT jump to around 250ms.

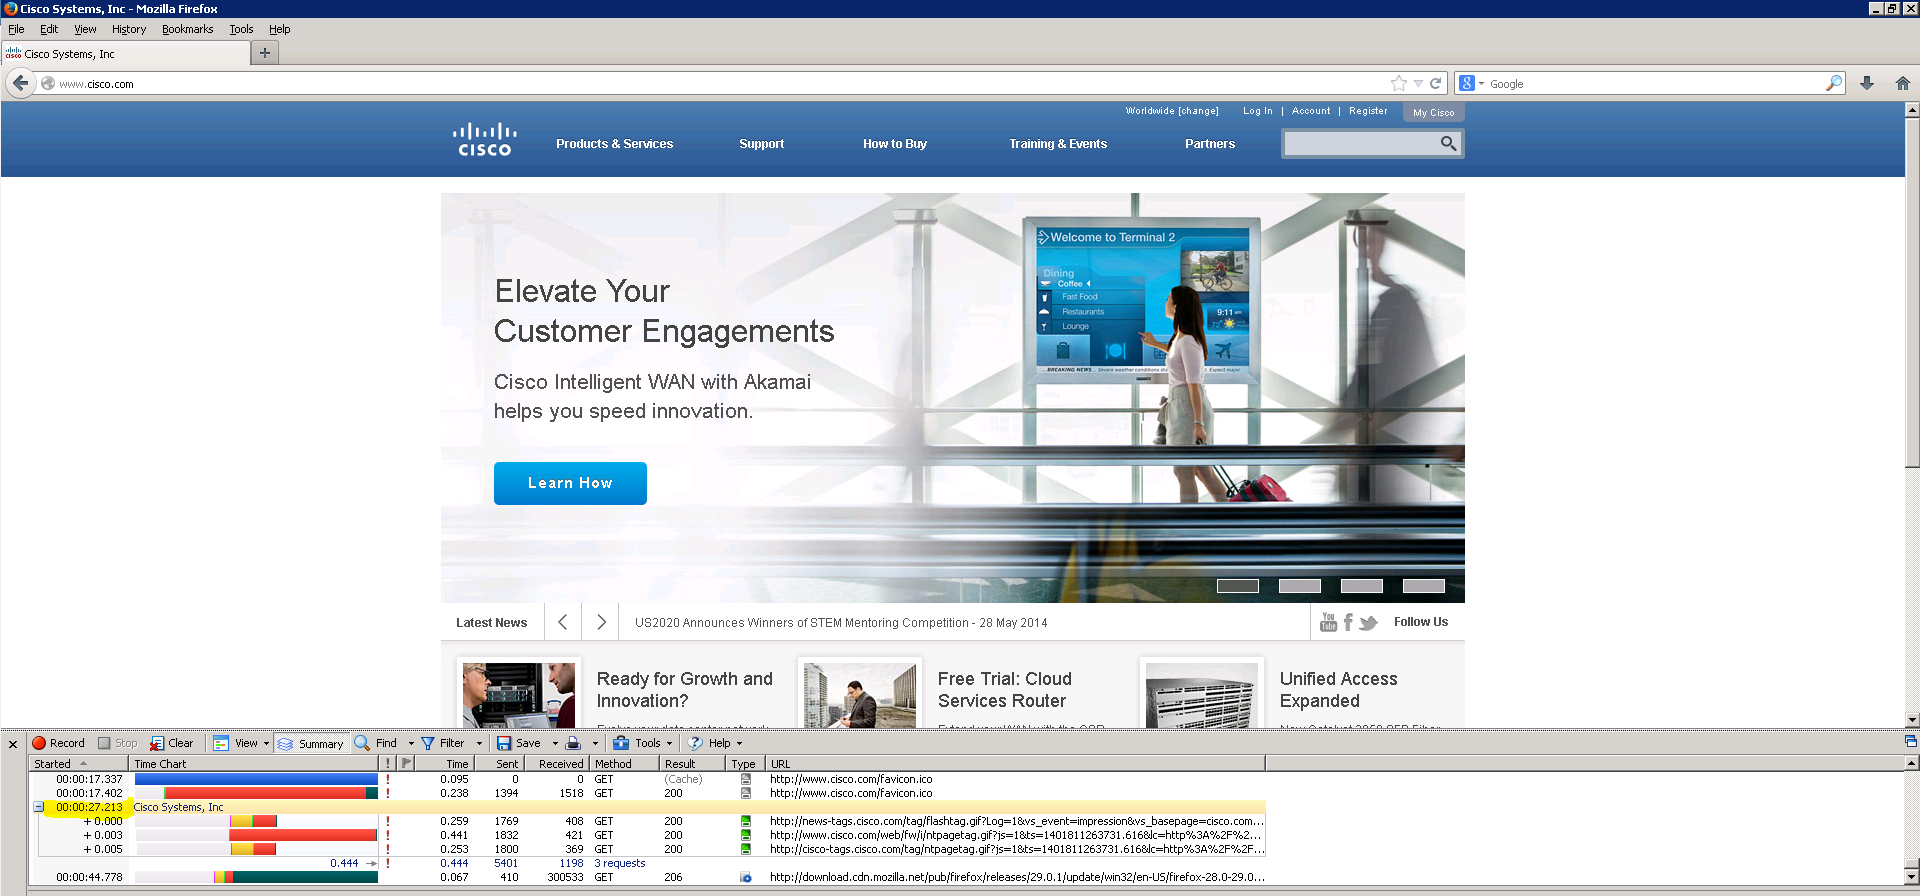
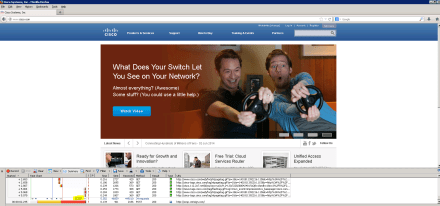
Here’s one more example. In this example I’ll test going to Cisco.com in a browser without any WAN emulation applied, and then I will apply some WAN emulation that makes the connection speed 128Kbps. In both examples I’m using HTTPWatch to test how long it takes to completely load the page. In this screenshot you see the normal load time is 5.352 seconds.
I then start up Network Simulator and set the appropriate settings.

And here is the HTTPWatch noticeably slower time for loading Cisco.com after the WAN emulation is applied:

For Linux/VMs
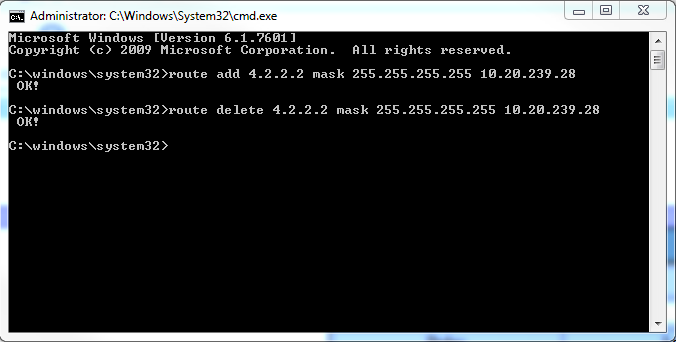
If you don’t want to install software to your computer, one of the more popular free WAN Emulators is the open source WANEM. It is well documented and there are a number of other blog articles written on it’s different features. WANEM comes in the form of a bootable ISO based on Linux that you could startup in any spare laptop you have lying around. If you don’t have a separate computer to dedicate to this you could also install VirtualBox and load up either the bootable ISO or if you have VMWare you could grab the Virtual Appliance they offer. Once it’s up and running there is a web GUI you can access to set all of the parameters. In this example I had VirtualBox running the bootable ISO on my machine in ‘bridged mode’ networking so it grabbed a real address via DHCP on my network. There are multiple ways you can send traffic to WANEM, all of which are covered in the documentation so I won’t go into much detail. In this example I defined a route on my Windows machine sending all traffic for a test IP address to the WANEM IP address. Alternatively you could define a route on your machine to send ALL traffic to WANEM. It all depends on what you are testing. When adding the routes in Windows you need admin rights(‘Run as Administrator’ for a cmd prompt). For my example I added a route for a specific host like this, where 4.2.2.2 is the destination address and 10.20.239.28 is the IP address of the WANEM software in my VirtualBox:

Once WANEM is running you can browse to it in a web browser and start set the parameters. One cool thing you can do is use their ‘WANalyzer’ which will let you enter in a test IP address and evaluate the network between WANEM and the test IP to determine stuff like the speed, delay, and jitter. You then can apply these settings directly to any of the traffic you are testing in the emulator. This is good if you aren’t sure about what your network conditions are like and can be a good place to start. I would use this with caution and check the results to see if they are what you would expect. If you know all of the settings already, then you can skip this part. This is what the results look like for the WANalyzer to a test IP:

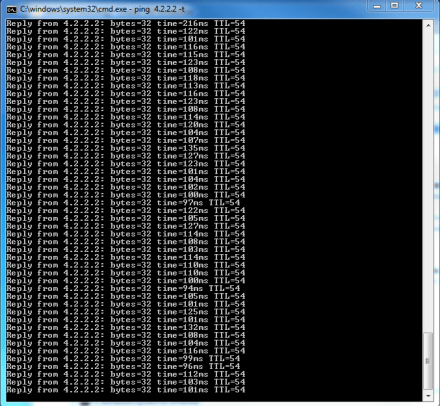
I ended up ignoring the settings from WANalzyer and just ended up setting my own, defining a delay of 100ms:

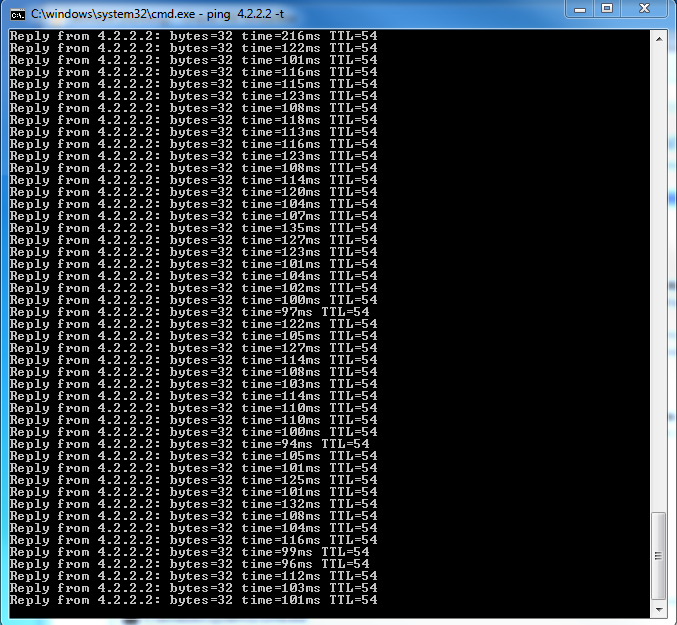
Performing a ping to the test IP 4.2.2.2 shows RTT around 100ms:
When you are done testing, make sure you delete any routes you added to your test machines. If you don’t you’ll just end up pulling your hair out later on when you are getting poor performance or something isn’t working correctly:

For the MAC
If you are on a MAC and don’t feel like installing anything, good news, you have a WAN emulation software already built in. This takes advantage of the built-in ‘ipfw’ app. There are two parts to setting this up, the first involves creating pipes that define the source and destination of the traffic you want to send through the WAN emulator, and the second involves configuring the pipes for things like bandwidth, latency, and packet loss.
Here’s the first part, I’ll define the traffic I want to send through the WAN emulation In this case I’ll pick traffic going to Google’s public DNS 8.8.8.8:
sudo ipfw add pipe 1 ip from any to 8.8.8.8
sudo ipfw add pipe 1 ip from 8.8.8.8 to any
Next I’ll add in the delay for that pipe. In this case, we will add in 75ms delay. Besides delay you can also set the speed and packet loss. The syntax is:
sudo ipfw pipe 1 config delay [delay] bw [bandwidth] plr [packetloss_as_decimal]
For mine i used:
sudo ipfw pipe 1 config delay 75ms
sudo ipfw pipe 2 config delay 75ms
And here is the output of a ping:
-iMac:~ Joe$ ping 8.8.8.8
PING 8.8.8.8 (8.8.8.8): 56 data bytes
64 bytes from 8.8.8.8: icmp_seq=0 ttl=45 time=176.715 ms
64 bytes from 8.8.8.8: icmp_seq=1 ttl=45 time=176.334 ms
64 bytes from 8.8.8.8: icmp_seq=2 ttl=45 time=175.636 ms
64 bytes from 8.8.8.8: icmp_seq=3 ttl=45 time=187.775 ms
This is ~175ms, 75ms in each direction, plus around 25ms of normal RTT without the ipfw rules.
When you are done testing, make sure to delete the rules or flush them out:
sudo ipfw -q flush
Wrap Up
So that’s it, I’d encourage you to play with some or all of these tools and get familiar with them. Whether you just want to learn how different network conditions can impact applications or you have a real project you want to test out, they are very useful. There are some limitations as to the conditions you can test with each of the tools, so read through some of the documentation first to make sure they will yield accurate results for your test scenarios. If you are looking to test something beyond what the free versions can offer you can look to some of the paid versions of software that are out there. Hope this was helpful.